Archives for April 2024

Common Ceiling Waterproofing Problems and Solutions

Ceilings are often overlooked when it comes to waterproofing, yet they are susceptible to a range of issues that can arise from water infiltration. From leaks and dampness to mold growth and efflorescence, these common problems can compromise the integrity of a building and create an unhealthy indoor environment. In this article, we will delve into these common ceiling waterproofing problems and explore how Dr. Fixit products offer effective solutions to address them.

Leaks

Issue: Leaks in ceilings can result from various factors such as roof damage, plumbing leaks, or poor waterproofing. Water seeping through ceilings not only causes unsightly stains but also poses a risk of structural damage and mold growth.

Dr. Fixit Solution: Dr. Fixit offers a range of leak-proof coatings and sealants that effectively seal cracks and gaps in ceilings, preventing water ingress and leakage. These products provide a durable barrier against water infiltration, ensuring a watertight seal for long-lasting protection.

Dampness

Issue: Dampness in ceilings can be caused by condensation, rising damp, or water leaks. Persistent dampness can lead to paint peeling, mold growth, and structural deterioration if left unaddressed.

Dr. Fixit Solution: Dr. Fixit’s damp-proof coatings and membranes are designed to combat dampness by creating a moisture-resistant barrier on ceilings. These products help prevent water penetration, reduce humidity levels, and protect the structure from moisture-related damage.

Mold Growth

Issue: Moisture accumulation in ceilings provides an ideal environment for mold growth, which not only affects the aesthetics of the space but also poses health risks to occupants.

Dr. Fixit Solution: Dr. Fixit offers mold-resistant coatings and treatments that inhibit mold growth on ceilings. These products contain anti-fungal properties that prevent mold formation, ensuring a clean and healthy indoor environment.
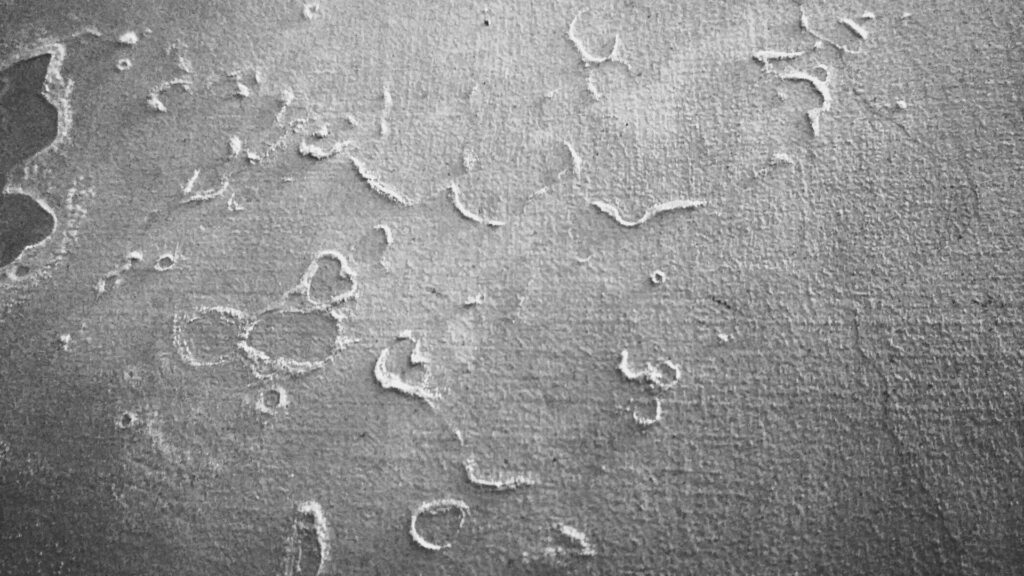
Efflorescence

Issue: Efflorescence is a common problem in ceilings where white, powdery deposits form due to water-soluble salts leaching through the surface. This not only detracts from the appearance of the ceiling but also indicates underlying moisture issues.

Dr. Fixit Solution: Dr. Fixit’s efflorescence control products help prevent the formation of efflorescence on ceilings by blocking the migration of salts through the surface. These solutions effectively mitigate efflorescence formation and maintain the aesthetic appeal of the ceiling.

Addressing common ceiling waterproofing problems is essential to maintain the integrity and aesthetics of a building. By utilizing Dr. Fixit’s range of high-quality waterproofing products tailored for specific issues like leaks, dampness, mold growth, and efflorescence, you can effectively protect your ceilings from water damage and ensure a safe and healthy indoor environment for years to come.

Read more

Step by Step Guide  to Ceiling Waterproofing

Step-by-Step Guide to Waterproofing Ceilings

Waterproofing ceilings is essential to protect buildings from water damage, mold growth, and structural deterioration. By following a systematic approach and using high-quality products like those offered by Dr. Fixit, you can effectively waterproof different types of ceilings. In this comprehensive guide, we will walk you through the step-by-step process of waterproofing ceilings using Dr. Fixit products, covering surface preparation, product selection, application techniques, and curing.

Surface Preparation

1. Inspect the Ceiling – Begin by inspecting the ceiling for any cracks, gaps, or signs of water damage. Address any existing issues before proceeding with waterproofing.

2. Clean the Surface – Thoroughly clean the ceiling surface to remove dirt, dust, grease, and any other contaminants that may hinder adhesion of the waterproofing products.

3. Repair Cracks and Holes – Fill in any cracks or holes in the ceiling using Dr. Fixit Crack-X Paste or similar repair products to ensure a smooth and even surface.

Smooth Out Uneven Areas: Sand down any rough or uneven areas on the ceiling to create a uniform surface for better product application.

Product Selection

4. Choose the Right Product – Select a Dr. Fixit waterproofing product suitable for the type of ceiling you are working on (concrete, metal, wood, etc.) and the specific waterproofing requirements.

5. Consider Application Method –  Depending on the product chosen, determine whether it needs to be applied as a coating, membrane, sealant, or other form for optimal waterproofing results.

Application Techniques

6. Priming – Apply a coat of Dr. Fixit Primer or suitable primer recommended for the specific product being used to enhance adhesion and penetration into the substrate.

7. Apply Waterproofing Product – Follow the manufacturer’s instructions for mixing and applying the waterproofing product onto the ceiling surface. Use a brush, roller, or sprayer as recommended for even coverage.

Ensure Even Application – Ensure that the waterproofing product is applied evenly across the entire ceiling surface to create a seamless protective barrier against water ingress.

Allow for Drying/Curing Time: Allow the waterproofing product to dry/cure as per the manufacturer’s guidelines before applying additional coats or finishing treatments.

Curing

8. Protective Layer – Once the waterproofing product has dried/cured completely, consider applying an additional protective layer for enhanced durability and longevity of the waterproofing system.

9. Regular Maintenance – Inspect the waterproofed ceiling periodically for any signs of damage or wear and perform necessary maintenance to ensure continued protection against water infiltration.

By following this step-by-step guide and using Dr. Fixit’s range of high-quality waterproofing products tailored for different types of ceilings, you can effectively supervise the process of waterproofing your ceilings and safeguard your building against water-related issues for years to come.

Read more